I love to do crafts and have cute handouts and activities for church (and school, and friends, and - well you get the idea). I don't consider myself creative, but often use the help of others' talents. I decided to share what I'm doing for others just like me. It may be a link to where I found something or it might even be something *I* created. Right now I work as a paraprofessional at my kids' elementary - in special ed (autism). I started creating items for my 3rd graders this year and can't wait to share them with you. I am the 1st counselor in YW (first time in YW is this past year). I also have ideas for cub scouts and sunbeams posted, my previous callings.

Sunday, January 29, 2012

New Neighbor Gifts


We have two neighbors that moved in recently.  I searched the web looking for ideas.  I couldn't find anything that popped out of me until I saw this Christmas gift on Pinterest:


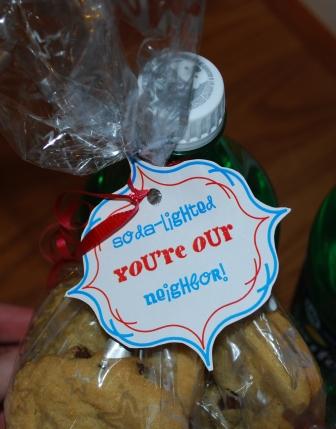
I thought that it would be a great gift for the new neighbors.  I wonder why I didn't think of that before!  I have used the same saying for teachers.  I pulled up the site ~after I bought the soda and made the cookies ~  to find out that it costs $5 for the tags.  Well, I'm cheap enough that I made my own.  They are nearly as pretty as hers, but they are free.  I also changed up the colors so they didn't look like they were intended for Christmas:


There are two to choose from if you would like to use them.  I found some cute one liter bottles.  I bought a Sprite and an Orange Fanta.  Then we made some homemade cookies and attached them in a plastic bag to the sodas.  


Another idea I saw was to include a family picture.  I had some left from Christmas I was going to include, but I think they may have been tossed in the weekend cleaning.  They turned out cute and it was a great excuse to pop over and visit the new neighbors (who by the way are very nice).
If you would like my free tags click below. 


Saturday, January 28, 2012

Owl Treat Toppers


I'm currently working on an owl birthday party for Boo's 8th birthday.  I came across a picture of some owl toppers on Pinterest and fell in love.  I loved it so much we are using it for her party and she used it for her classroom treats.  I can't link to the site where the picture originated because you have to have a log on to get in.  I couldn't get to it either, but it isn't hard to figure out how to make.  But if you are one that prefers step by step instructions, I will tell you how I did it.
I the head is actually a Sizzix die cut found through Stampin' UP: the top note die.  I used my cricut & gypsy to cut out the shapes.  You can use punches to cut out the shapes.
First use the top note die cut and brown cardstock. Score down the middle of the die (in the picture the score line would go vertical - top to bottom).

Fold it in half.  This makes your owl shaped face.

Cut out the eyes.  I used the gypsy because I liked the size of the circles I could do.  I used the cartridge called George and Basic Shapes.  I cut out tan eyes 1.45 inches, white at 1.07 inches, and black at .44 inches.  Then you glue them all together.  I just used a glue stick.


Then glue on the eyes.  I made them look a little crazy eyed.   Black towards the center, but the eyes don't need to match.  They look cuter that way.

 Next you need to cut out the beaks.  I used the rounded triangle shape on the same cartridge at 1/2 inch (I didn't use the gypsy for this shape).  You could also use the diamond at 1 inch and fold them in half.  We may do this for the birthday party, but I didn't have time to do it for the class.  I really like this look though.  When I make more I'll try both ways and post a picture for you to decide what you like it best.

Here they are in stacks of five so I could keep track of how many I made.  Aren't they cute?  Be careful with the glue stick or they will look like that poor owl in the front left.

Fill up a treat sack with your choice of treats and staple them on!  Fun, cute, and easy!

I linked to:

Sock Lollipops


These were supposed to be for Sis's Candyland birthday party (that I have yet to post about), but alas I was still moving into the craft room and the supplies were misplaced in the shuffle.  That, and I ran out of time.  I seem to do that every year!  The supplies had been uncovered and we thought they would make great presents for her friends at Christmas.  I found this idea somewhere on the ole world wide web, but I haven't a clue as to where (I wasn't on pintrest yet ~ nuff said).  I also need to work on my photography skills.  It doesn't help that most of my pictures are taken late at night after children have gone to bed and I have some time to my self.  I promise these are extra cute in person.  
Supplies: 2 pairs of different colored socks for each lollipop, 6 inch lollipop sticks and shrink wrap basket bag (you should be able to find it at Dollar Tree - that is where I found it, anyway).  Cello wrap would work too, you just can't shrink & tighten it around the sock. 
Here is how I made them.  I tried a couple different ways and this is what worked best for me.  We bought two packages of socks - one were striped and one dotted.  I had Sis pick out the colors she wanted to go together. 


First, fold one sock in half (I tried folding it only 1/4 of the way, but that made the lollipop thick on one side and thin on the other).  The toe should be on the left, the heel on the right (this will be the same for each sock).


Next fold the second sock - same color - in half.  They need to overlap a little.  Look at the picture above - the fold is at the bottom for the sock on the left and at the top for the sock on the right.  After trial and error I found that this looks the best when it is rolled.


Fold the 3rd sock in half (different color) and place it on top of the one on the left.  This time the fold is on the top.  Also scoot it over to the right a bit.  There should be some of the bottom sock sticking out.


Fold the last sock in half.  Place it to the right and on top of the sock.  It should hang over the bottom sock a little bit.  Tuck the toe in between the fold of the fold of the sock on the top left.  

 
Sorry about the change in colors and don't look how these socks are laying.  Follow the instructions above and the end result will look better - I promise.  Anyway, start on the right side and roll it up.  At first it will just be the top color and then the bottom will join in.  In a couple areas the sock will be a little thicker (at the heal & where you insert your foot) and you may want to tuck it down a little so it rolls a little more even.


When it is all rolled take a piece of scotch tape.  It doesn't need to go all the away around, but at least half way.  You could wrap it all the way around if you would like.


Pull and tuck as needed to make it them as even as possible.  They should look similar to those above.


Take some hot glue and on the scotch tape glue on the sticks.  You will need to hold the stick straight while the glue dries.  
I didn't take more pictures, but the next step is to cut the wrap the size you want to go over your sockpop.  Just place it over the sock, gather it at the bottom of the sock/top of the stick.  Twist a little then knot a ribbon around it.
I held my hand over the ribbon for the next step and covered up as much of the hanging plastic as possible.  With a hair dryer blow warm air on the plastic just around the sock.  It will shrink tight around the sock.  Don't melt it and try to only get the heat on the part around the sock.


You now have a fun gift to give to that fun girl(s) in your life.


If you have any questions leave me a comment.  Hopefully it all makes sense (and I don't have too many grammatical errors) because yet again it is way past my bedtime :)