I love to do crafts and have cute handouts and activities for church (and school, and friends, and - well you get the idea). I don't consider myself creative, but often use the help of others' talents. I decided to share what I'm doing for others just like me. It may be a link to where I found something or it might even be something *I* created. Right now I work as a paraprofessional at my kids' elementary - in special ed (autism). I started creating items for my 3rd graders this year and can't wait to share them with you. I am the 1st counselor in YW (first time in YW is this past year). I also have ideas for cub scouts and sunbeams posted, my previous callings.
Showing posts with label Tutorial. Show all posts

Sunday, September 9, 2012

Bulletin Board Make Over {Teacher Appreciation Week}

I have to preface this post.  I had the whole thing typed up and when I published it, it disappeared.  I had spent hours on it, twice, and I lost everything but my first paragraph and picture.  I was so frustrated I couldn't work on it. It was put off to work on later.  I guess now is later.  It may or may not be as long/detailed as before. 

For Teacher Appreciation week I saw some cute door make-overs over at Skip to My Lou.  I thought that it would be fun to do for my kids' teachers.  I decided to use their bulletin boards and make them over.
I loved the Recipe for Success idea and I had to use that one.   
This picture doesn't do it justice, it turned out much cuter than I can show you.  My plan was to buy a red and white checked table cloth, but I forgot to hit the party store to see if I could find one.  I did have red and white wrapping paper so I used that instead.  The title was cut out with a die cut machine (or cricut or silhouette would do the same thing):
I
If I had to do it again I would have put plain paper behind it so that it would be easier to read.  I then put on the recipe.
The top says Mrs. Yawberg has the recipe for success!  The recipe says: Take 11 boys and 16 girls. Sprinkle liberally with laughter and enthusiasm.  Marinate with creativity, knowledge and love.  Mix gently in a classroom.  Let simmer for 9 1/2 months.  This recipe make 27 students well prepared for Middle School.
I asked the students to write their own recipes of what make Mrs. Yawberg a successful teacher.  I photo copied their recipes and put them on the board:


I stapled paper plates, plastic cups, and utensils wrapped in napkins around the board. 
The original recipes I put in here:
 
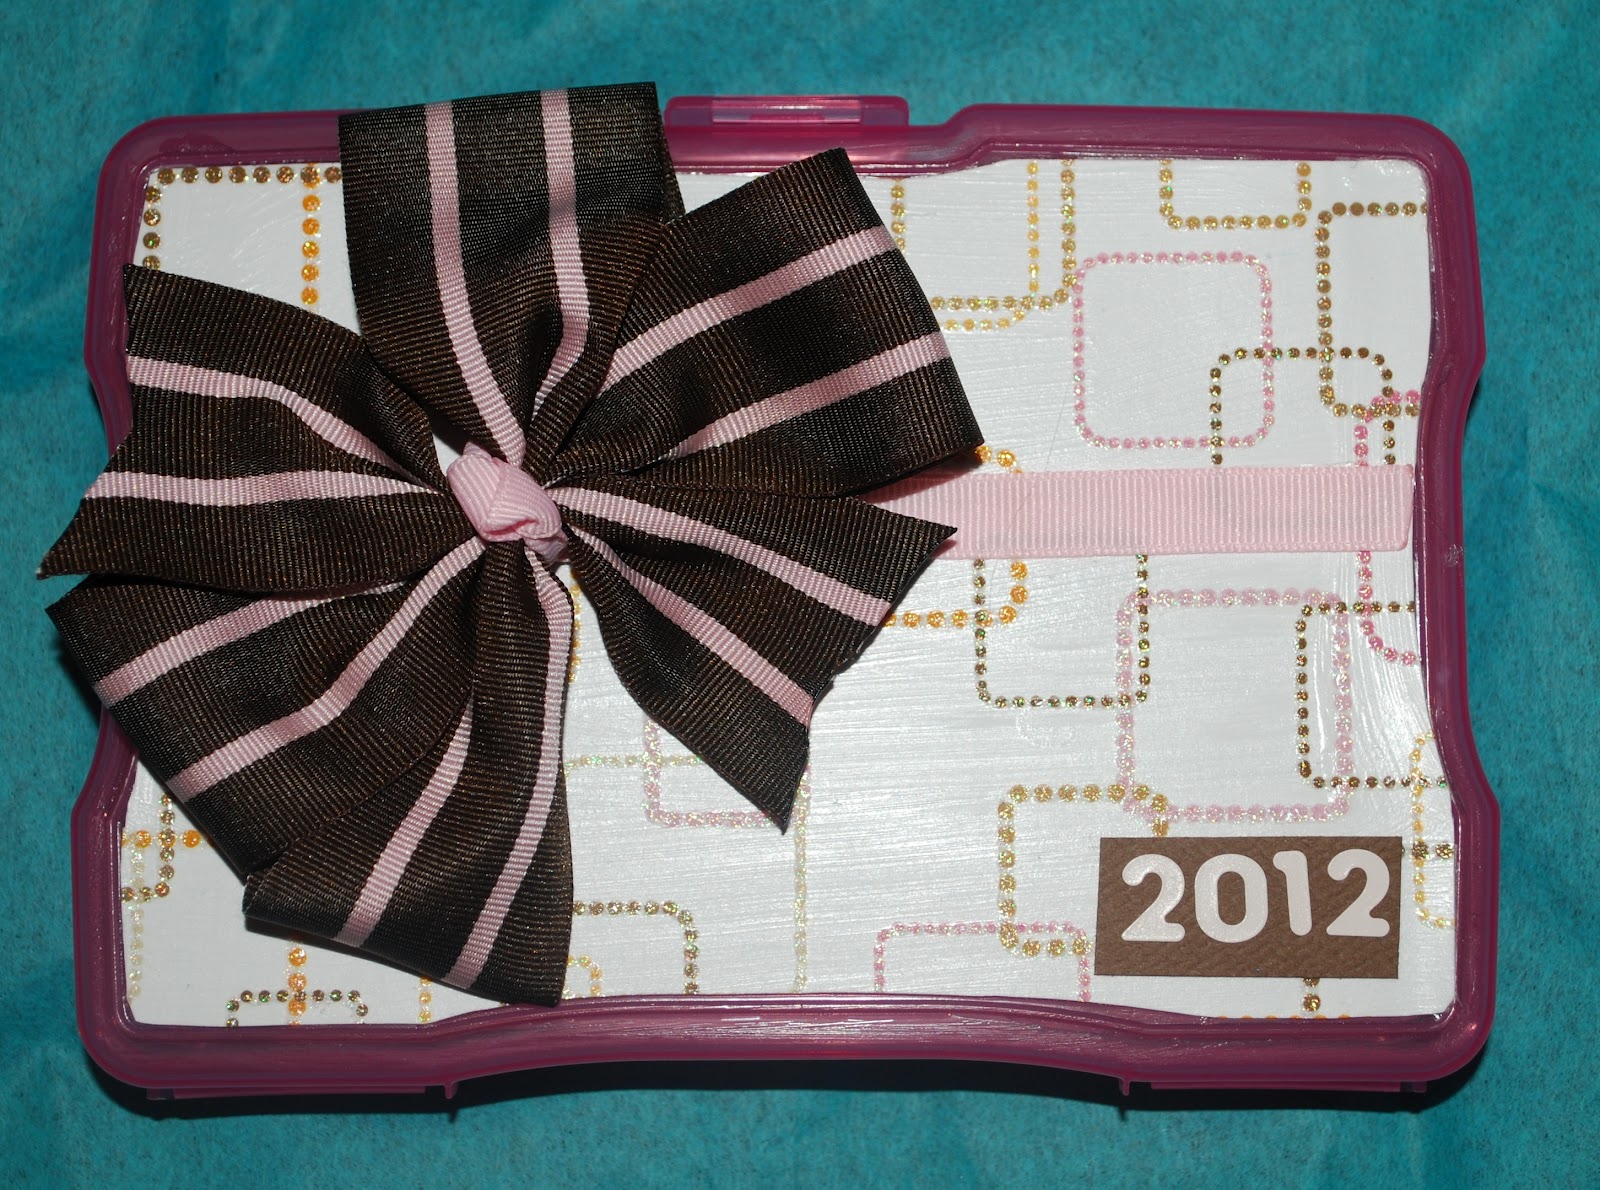
To make the holder I purchased a 4x6 photo holder from Micheals.  I mod podged paper onto the front.  I attached a coordinating ribbon with a tape runner.  I left a little gap to attach the bow. The bow on there is actually a barrette that I made.  I liked how it looked on it plus if she wanted to stack it she could remove the bow and have more room (or she could even use it in her daughter's hair).  I also put the year down in the corner.
To go along with the board I had the kids sign an apron.
I wrapped it all together with another teacher gift for the week:
 
The tag says 'We have to Ad-MITT, you are a great teacher!  Thanks for all you do!'  It was tied onto an oven mitt filled with cooking utensils and the apron wrapped around it.

We were going to get all the kids' pictures taken in an apron and chef's hat, but I didn't have the opportunity to go in there to do that.  I wanted to put their pictures on the board next to their recipes.  It would have been so cute and added so much more to it.

The other board we decorated (for our second grade teacher) we used the M&M theme.  I have used this years ago, but it is pretty popular now.  I found a cute poem to go with it.  
Here is the board:

The center of the boards says:
To make the boarder I cut out large circles (as large as I could get on 12x12 paper) in the color of m&m's.  I put part of the poem in each circle:

In between the large poem m&m's I put small ones.  In the center are m&m's that say 'Ms. Millson is magnificent because' and 'Ms. Millson is Marvelous because'.  The kids in her class each filled two of these out and then we hung them up:


For her treat we made her a bucket of M&M's complete with the poem. I found a clear paint can bucket and filled it with m&m's.  I tied ribbon along the side in the colors of the m&m's.
 I also slid in a copy of the poem.
Both teachers loved their boards!  It was a great end of school year board too.  I think there may have even been a few tears.

Download the M&M poem here (as seen in the can)

If you choose to download, please become a follower first (on the right).  I'm happy to share my creations with my followers.  If you would like to leave a comment too that would totally make my day!


Friday, August 31, 2012

Another Travel Post - Personal Hygiene Holder

Have you seen these on Pinterest?
I was thinking it would be a good idea to have.  I can't name how many times my kids have taken their stuff to a sleepover and left it or forgotten to put it back.  I thought this would be a good thing to have not only for our trip, but for future sleepovers.  I love the idea that if the toothbrush is still wet that it is in something that can not only let it dry, but is washable.

Here is what I did to make them.
Buy a 12x12 wash cloth.  You can get 2 for $1 at the dollar store.  That is what I started with to try it out.  When it worked I used a couple I already had at home.  The picture above sews every 3 inches.  I decided I didn't need a 3 inch section for my toothbrush and made some modifications.
For my son I sewed up the edges first.  
From the left edge I sewed another vertical line 2 inches away (this is huge for a toothbrush,  you can go much smaller if you wanted), then I gave another 3 inches for toothpaste, and the next section was 4 inches for deodorant.  This left 3 inches for a comb.  I used a small comb for him so that it fit in the pocket and didn't extend to get dirty from the wet toothbrush.

For my daughters I took a small piece of ribbon.  I sewd velcro on the ends so it could form a loop.  I took the middle and sewed it onto the edge of the washcloth:


Then I basically followed the same as for the boy. I used a tail comb for the girls so that the comb part fit in the pocket and didn't extend to get dirty from the wet toothbrush (the tail did, but that shouldn't get in their hair or can be easily cleaned before use).
After that I attached the ribbon.  Since the pockets aren't snug I pictured everything sliding out so I made another change here too.  I sewed ribbon on the edge at the middle and at the top.  The middle ribbon is 2 feet (I did smaller on the boys and it is a little harder to tie) and 18 inches on the top.  I just did a straight seam with the wrong side down facing the outside.  
I also heat sealed my ribbon so it wouldn't fray.  To do this just run the edge of the ribbon quickly through a flame (candle or lighter).  Then just roll it up and tie the ribbons.  
After this trip they will be used for sleepovers.  Everything they need will all be ready to go.  And when it gets wet or dirty, just throw it in the laundry!  Gotta love that!

Now that I have traveled here is what I have learned: you can make the sections smaller.  If you add more sections you made need to add length to the ribbon closures because they will be adding stuff and that will make it thicker when rolled.  My girls found all sorts of things to add and could have used more pockets.  My oldest ended up putting her comb behind her toothbrush (not sure if it stayed clean that way because she uses a brush most the time and probably could have left the comb out) and put some perfume where in the pocket.  My youngest doesn't wear deodorant so she used the pockets for perfume and body glitter.  To think at first I was wondering what to put in all the pockets, the girls figured it out for me.  I LOVE the loop to hold elastics.  That was very handy.


If you like this post or are going to use it, please take the time to be a follower first.  I also love hearing from you!  Thanks to those who take a little extra time to leave a comment :)

Sunday, May 13, 2012

Post-it Holder


I saw this idea floating around the blog world/pinterest: a cute post-it note holder.  I decided it was a simple and low cost gift for Teacher Appreciation week.  I purchased the clear plastic frames from Walmart (they are at Dollar tree too, but they are actually cheaper at Walmart).  I ended up buying 3.5x5 frames and two 4x6 frames (because they were out of the smaller size, but they cost the same).  I sent my daughter to pick out paper and she came back with the assortment you will see.  I was extra excited because I had coordinating sticker ribbon that went with this paper.  Next time I make them I will probably use bright colored paper, ribbon, and post-its. 
If you buy your frames Walmart don't forget to remove the plastic coating that protects the frame (the ones Dollar Tree didn't have it - another reason to buy from Walmart).  Just cut your scrapbook paper to fit inside the frame.  You can get fancy and use two colors, but I just used one print because the post-its cover most of it up.  Add some ribbon across the top and accessorize it.  I added flowers, tags, and some bling.  You could add the teacher's name or initial.
These just have yellow post-its.  The middle is a 4x6 frame.  My youngest found some heart post-its and wanted to use them for her teacher.  I obliged and we we added some post-it flags to the top.  The colors aren't as pretty as the yellow or green post-its, but it works(this is also the reason why I want to try bright coordinating colors next time):

I also had purchased some apple post-it holders at the beginning of the year.  I used these for the elementary school teachers and put their name on it with white stickers:
I tied it up with a cute tag found at Tip Junkie.  I also put the tag on the back of the plastic frames.


Friday, May 11, 2012

Seeds of Knowledge {Teacher Thank You}

 
As you may be able to tell from this years posts and last years, I try to give a present a day during teacher appreciation week.  The Middle School Teachers and Specialist usually have something a little smaller than the Elementary Teacher's gift (and home room in middle school).  While trying to plan out the week I found a cute idea at Tatortots and Jello.  I love how they printed right on the brown paper bag.  I've got to remember this for future use!

I made the cute tags and attached them to a package of seeds for the specialists (don't forget your librarian, art, music, PE, computer, and paraprofessionals) and my daughter's middle school teachers.  For my kids' elementary teachers we took it up a step and added gardening gloves and pots.  I chose not to decorate the pots because I wanted to make sure it is something they would use.
Here is what I did.  First I cut a brown paper bag from the grocery store into 8 1/2 x 11 pieces.  I printed my tags below onto it.
I then trimmed them down.  I had the packets of seeds downstairs when I started cutting so I made them a little short.  I recommend measuring the packages before cutting so they are the same size.
To add the distressed look crumble up the paper.  The Tatortots and Jello said to iron it, but I iron only when absolutely necessary.  Instead I stuck them under a few books and went to bed (turns out a few minutes works too when I realized then next morning that I had forgotten one).
Then I stapled the tag right to the front of the seeds.  I chose to add ribbon in my kids' school colors. Just cut the ribbon, hold under the stapler when stapling, then tie around the staple.
Then I wanted to add to the distressed look so I brought out the chocolate ink pad.  At first I just went over the edges then I lightly rubbed it across the front trying to only get the ink on the creases.
If you choose to use the ink then I recommend doing it before you staple it onto the seeds.  I really like how it turned out.  The seeds were just over $1 a package and everything else I had on hand!

You can make your own tag, but if you prefer everything as easy as possible then download the I made below.  Just print on 8 1/2 x 11 paper (in my case I cut it out of a brown paper bag).

Download it HERE
 If you decide to download, please take the time follow my blog or to leave a comment.  Knowing people use it makes taking the time to take pictures and create posts worth it.  Thanks for visiting!


Friday, May 4, 2012

Teacher Thank You {Hand Sanitizer}

Teachers always need Sanitizer.  You don't want to even think about the germs we encounter each day.  This post will show you how to take these already cute pocket sanitizers:
and turn them into an easy to make gift for your teacher or anyone who has lend you a helping hand:


A few months ago Bath and Body Works had a great sale on their pocket size sanitizers.  I don't remember how great, but I believe they ended up being just over a quarter a piece.  I bought a bunch and then decided to save them for teacher appreciation week. 
Since my giving at the middle school has lacked I decided to give them to the staff at my daughter's middle school (she has a much smaller school than the elementary) and we will also give them to the specialists, my kids' teachers, and office staff at the elementary school. 
For those that know me know that I couldn't just hand over the sanitizers, I had to find a saying.  I searched the Internet, but didn't find any sayings that would work so I ended up making up my own.  Here is what I came up with:
We are grateful for the hands that have helped us this year!
or
I am grateful for the hands that have helped me this year!
Even though I didn't find what I was looking for in my search for sayings, I was lucky enough to stumble upon a tutorial for a cute holder for the sanitizer over at whatever Dee Dee wants.


Here is what I did:
Supplies: Paper cutter, Paper Scorer, 1 inch circle paper punch, card stock, 2 inch circle paper punch and/or flower Stampin' Up punch, and the free printables at the end of this post.
I found a site that has free printables.  They are actually for a wedding, but I found one that worked for this.  You can use it to, go to The Wedding Chicks and click on the escort tab.  The color combination's I used are Antique Pink with Light Gray, Perfect Pink with Dark Gray, Tiffany Blue with Chocolate, Vibrant Yellow with Light Gray.  Print the design on card stock (or you can use printed/plain card stock). 
Next you need to score your paper.  If you use the Chevron style that I did make sure your paper is facing the correct direction.

First score at 2 inches:


 Score at 3 inches:
 Then Score at 6 1/2 inches:
 And again at 7 1/2 inches:
 Next at 9 3/4 inches:
 And finally at 10 3/4 inches:
 Trim off the white edge (on the long side) and cut a strip 2 inches by 11 inches:
You are going to punch at the end with the little tab (1/4 inch tab).  My punch wasn't deep enough to punch the hole so I had to fold over the tab and then punch.  I punched it in a little further so that it wouldn't punch completely through the tab, but it punched a little onto the other side.  When completed it doesn't look bad.  If you have the Stampin' Up punch it will fit perfectly in between the scored lines without folding over the tab.
Fold on your scored lines.  Use adhesive (I used a tape runner) and put it on your tab:
 Slide the hand sanitizer through the hole,
 fold over the tab and adhere to the back:
 Put adhesive on the inside of the end flap, fold over and seal:
 It will now be in a cute box.  Print and punch out the printables.  Adhere to the flap above the design:
Sideview:
I hope that all make sense.  It seems the only time I have to do these posts are late at night (we are pushing midnight ~ hopefully I can get the printables linked before I hit the sack.  Hmmm, might need a Dr. Pepper at school tomorrow).
I have lots of options for the printables.  There are the four color combinations, two sizes (one for the flower punch one for the 2 inch circle punch), and 2 wording options (one has 'I' the other 'we').  Here are some examples:

Here are the printables:

If you decide to download, please take the time follow my blog or to leave a comment.  Knowing people use it makes taking the time to take pictures and create posts worth it.  Thanks for visiting!

I plan to make a few more sayings to go with the hand sanitizer and possibly make them in a bigger size too.  For now these will also work tied around a larger bottle of sanitizer.

A couple more pictures of the work in progress:


Linked up to parties on my sidebar including: