Just because this comes up when I'm trying to write posts I figure I should just share it with you. We have done this for several years (at least 5, but probably closer to 6) and we did a smaller version when we lived in Utah.
We have four families that participate. For a time we had five and at times that was a little much, but four seems to work out well. Basically what happens is that we rotate between families turns watching all four families children. For example on the first week it is our turn to watch all the kids while the other three couples go out on a date. Then the next three weeks we are kid free and have dating opportunities. Since we live where the commute is awful and husbands get home late we do our date night on Saturday night. It is four hours long. We have switched start and end times. When church started at 9:00 we went 5:00-9:00. The bad thing about this is that it is almost impossible to go to the movies. We had 6:00-10:00 at one time. It was always a late night for the kids (and sometimes for the ones watching them). Right now we go 5:30-9:30 and it seems to work well.
Some of the things that we worked out: If you can't go you don't. If it is your turn to babysit and you can't then you trade days with another family. If we all have something the same night (usually a church activity) we skip that week and continue the rotation. We always have a snack. At one time we talked about doing dinner, but we don't. Sometimes we will bring a Little Caesar's pizza home and feed everyone. We usually have to feed our kids a snack before bedtime (another reason I like the 9:30 end time over the 10:00) after we pick them up. When a family moves we ask another family to join. All the families currently involved have 3 kids. One family their oldest has never come and often my oldest goes with her friends and isn't there either.
It works out really well and gives us at least three dates a month. Often we end up at home catching up on shows and eating Chinese food, but we have that quality alone time. The kids love it because it gives them a time to be able to play with their friends. Our group is formed up of church friends and they often only get to see them at church (two of the families go to different schools). I highly recommend doing this if you have young kids.
Sunday, February 24, 2013


Monday, February 11, 2013
Mustache Valentines

I created a bunch of mustache themed Valentines. Some we will use and some are just for you! Two sets were inspired from some great Amazon deals: adhesive mustaches (you can find these anywhere, even at the dollar store) and mustache earrings. My original plan was for Boo to give the girls in her class mustache earrings and the boys adhesive mustaches, but much to my dismay I learned that there are a lot of 8-9 year old girls who don't have their ears pierced yet. So her class will receive the adhesive mustaches and the teen will give the earrings to her friends.
Here is what I came up with for the adhesive mustaches:

I intended the first mustache saying to be used with the mustache earrings, but work well with the adhesive mustaches. The saying just is used a lot, but that is all I could come up with for mustache earrings. They were less than $1 each on Amazon with free shipping. They take a long time to get here so if you want to do this order them for next year.
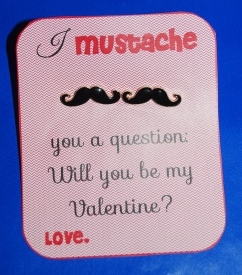
You can also use the "stick" one with a stick or package of gum. Or even a package of paperclips or staples for your teacher.


I also made one that you can just print (no earring, gum, adhesive mustaches required). These are designed to go on the jumbo craft sticks. These sticks can be found in any craft store. I bought a large box at Wal-mart.


For some reason I couldn't get the chevron background to print correctly on most of them (and of course I didn't find this out until working on them for hours). They will print from Microsoft word, but not from a PDF file. Unfortunately if you don't have the same fonts on your computer they won't look right if you try to print for word. I tried changing up the background for you, but I still had problems. So I decided to take out the background and print it on colored patterned paper (it is actually cheaper this way because it saves a lot of ink). I picked up a package of 12 sheets of paper in the Valentine dollar section at Target:


Here are all your downloads and as always: If you choose to download, please become a follower first (on the right). I'm happy to share my creations with my followers. If you would like to leave a comment too that would totally make my day!
If you have and questions, problems, or comments, leave me a message!
Here are a couple more downloads for the craft sticks:
I'm out of magenta ink so I haven't printed all of these. If there is a problem, let me know. If I was selling them I would triple check everything, but since they are freebies I'm relying on you for feedback.
Scroll down for last year's Valentines. That post also has a link to the Valentines made the year before!
Scroll down for last year's Valentines. That post also has a link to the Valentines made the year before!
I linked with
Monday, January 14, 2013
DIY Valentine's Gifts
I never posted the Valentine's gifts I made last year so in case you are looking for ideas here is what we did:
I made some salt dough (play dough) for my first grade class that I go into. I dyed it red and I rolled it out. Using a cookie cutter I cut it into heart shapes. I put one heart into a snack size baggie (there was room that I could have put two in each bag) and stapled a Valentine's Topper over the zipper of the bag:
 Actually, I cut out a topper out of cardstock, folded it over the bag, stapled. Then printed off the saying onto regular paper and used a tape runner to place it over the cardstock. That way you don't see any staples.
My youngest gave out hugs and kisses:
 First I took some Valentine kisses and wrapped them in red saran wrap and tied it with valentine ribbon (don't cut the ribbon yet):
 Slide on the tag:
 And tie it around a Hug barrel drink (I bought them at Walmart):
 Slide in the straw, trim your ribbon and you have a gift of Hugs and Kisses!

If you have the mini zip top bags that you can find in the craft store you can use those. You can use those two ways: 1- fill with hugs and kisses OR 2- fill with kisses and attach to a hugs barrel drink (like above). These are cute, but I didn't have enough left for the whole class. I made these the same way as the dough.

Last year owls were all the range and I incorporated them into my son's Valentine's. His class didn't really do an exchange, but we made some anyway. I had come across a great deal on scented pencils (a bucket of them) over the summer and bought them. My kids loved them so I knew the 5th graders would too. I used my cricut to cut out owl shapes (you could use clip art). I had two ideas:


We ended up using the first one (click on the pictures to enlarge). I cut out the owls and then printed the saying on labels and stuck them on the back. We taped on the pencil towards the bottom - we wanted it to be like a branch. The second idea was shaped more like a traditional valentine with the saying at the top and a branch at the bottom. I cut slits into the paper to slide the pencil in on the branch. Here is a close up of the saying - he didn't want it lovey dovey, he is a 10 year old boy (you could use valentine instead of friend, but he chose friend):

If you still need ideas check out this post for fun saying/tags or the post from the year before here. You can view instructions/download tags for:



I made some salt dough (play dough) for my first grade class that I go into. I dyed it red and I rolled it out. Using a cookie cutter I cut it into heart shapes. I put one heart into a snack size baggie (there was room that I could have put two in each bag) and stapled a Valentine's Topper over the zipper of the bag:

My youngest gave out hugs and kisses:


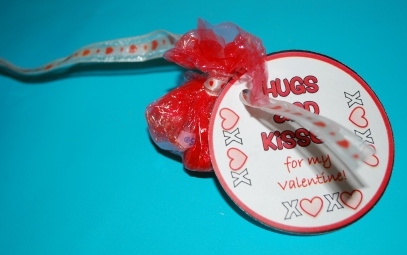


If you have the mini zip top bags that you can find in the craft store you can use those. You can use those two ways: 1- fill with hugs and kisses OR 2- fill with kisses and attach to a hugs barrel drink (like above). These are cute, but I didn't have enough left for the whole class. I made these the same way as the dough.
Last year owls were all the range and I incorporated them into my son's Valentine's. His class didn't really do an exchange, but we made some anyway. I had come across a great deal on scented pencils (a bucket of them) over the summer and bought them. My kids loved them so I knew the 5th graders would too. I used my cricut to cut out owl shapes (you could use clip art). I had two ideas:


We ended up using the first one (click on the pictures to enlarge). I cut out the owls and then printed the saying on labels and stuck them on the back. We taped on the pencil towards the bottom - we wanted it to be like a branch. The second idea was shaped more like a traditional valentine with the saying at the top and a branch at the bottom. I cut slits into the paper to slide the pencil in on the branch. Here is a close up of the saying - he didn't want it lovey dovey, he is a 10 year old boy (you could use valentine instead of friend, but he chose friend):

If you still need ideas check out this post for fun saying/tags or the post from the year before here. You can view instructions/download tags for:


You could also use mini flashlights or glow sticks for this tag.
Linking up here:
Sunday, September 9, 2012
Bulletin Board Make Over {Teacher Appreciation Week}
I have to preface this post. I had the whole thing typed up and when I published it, it disappeared. I had spent hours on it, twice, and I lost everything but my first paragraph and picture. I was so frustrated I couldn't work on it. It was put off to work on later. I guess now is later. It may or may not be as long/detailed as before.
For Teacher Appreciation week I saw some cute door make-overs over at Skip to My Lou. I thought that it would be fun to do for my kids' teachers. I decided to use their bulletin boards and make them over.
I loved the Recipe for Success idea and I had to use that one.
 This picture doesn't do it justice, it turned out much cuter than I can show you. My plan was to buy a red and white checked table cloth, but I forgot to hit the party store to see if I could find one. I did have red and white wrapping paper so I used that instead. The title was cut out with a die cut machine (or cricut or silhouette would do the same thing):
If I had to do it again I would have put plain paper behind it so that it would be easier to read. I then put on the recipe.
 The top says Mrs. Yawberg has the recipe for success! The recipe says: Take 11 boys and 16 girls. Sprinkle liberally with laughter and enthusiasm. Marinate with creativity, knowledge and love. Mix gently in a classroom. Let simmer for 9 1/2 months. This recipe make 27 students well prepared for Middle School.
I asked the students to write their own recipes of what make Mrs. Yawberg a successful teacher. I photo copied their recipes and put them on the board:


 I stapled paper plates, plastic cups, and utensils wrapped in napkins around the board.
The original recipes I put in here:
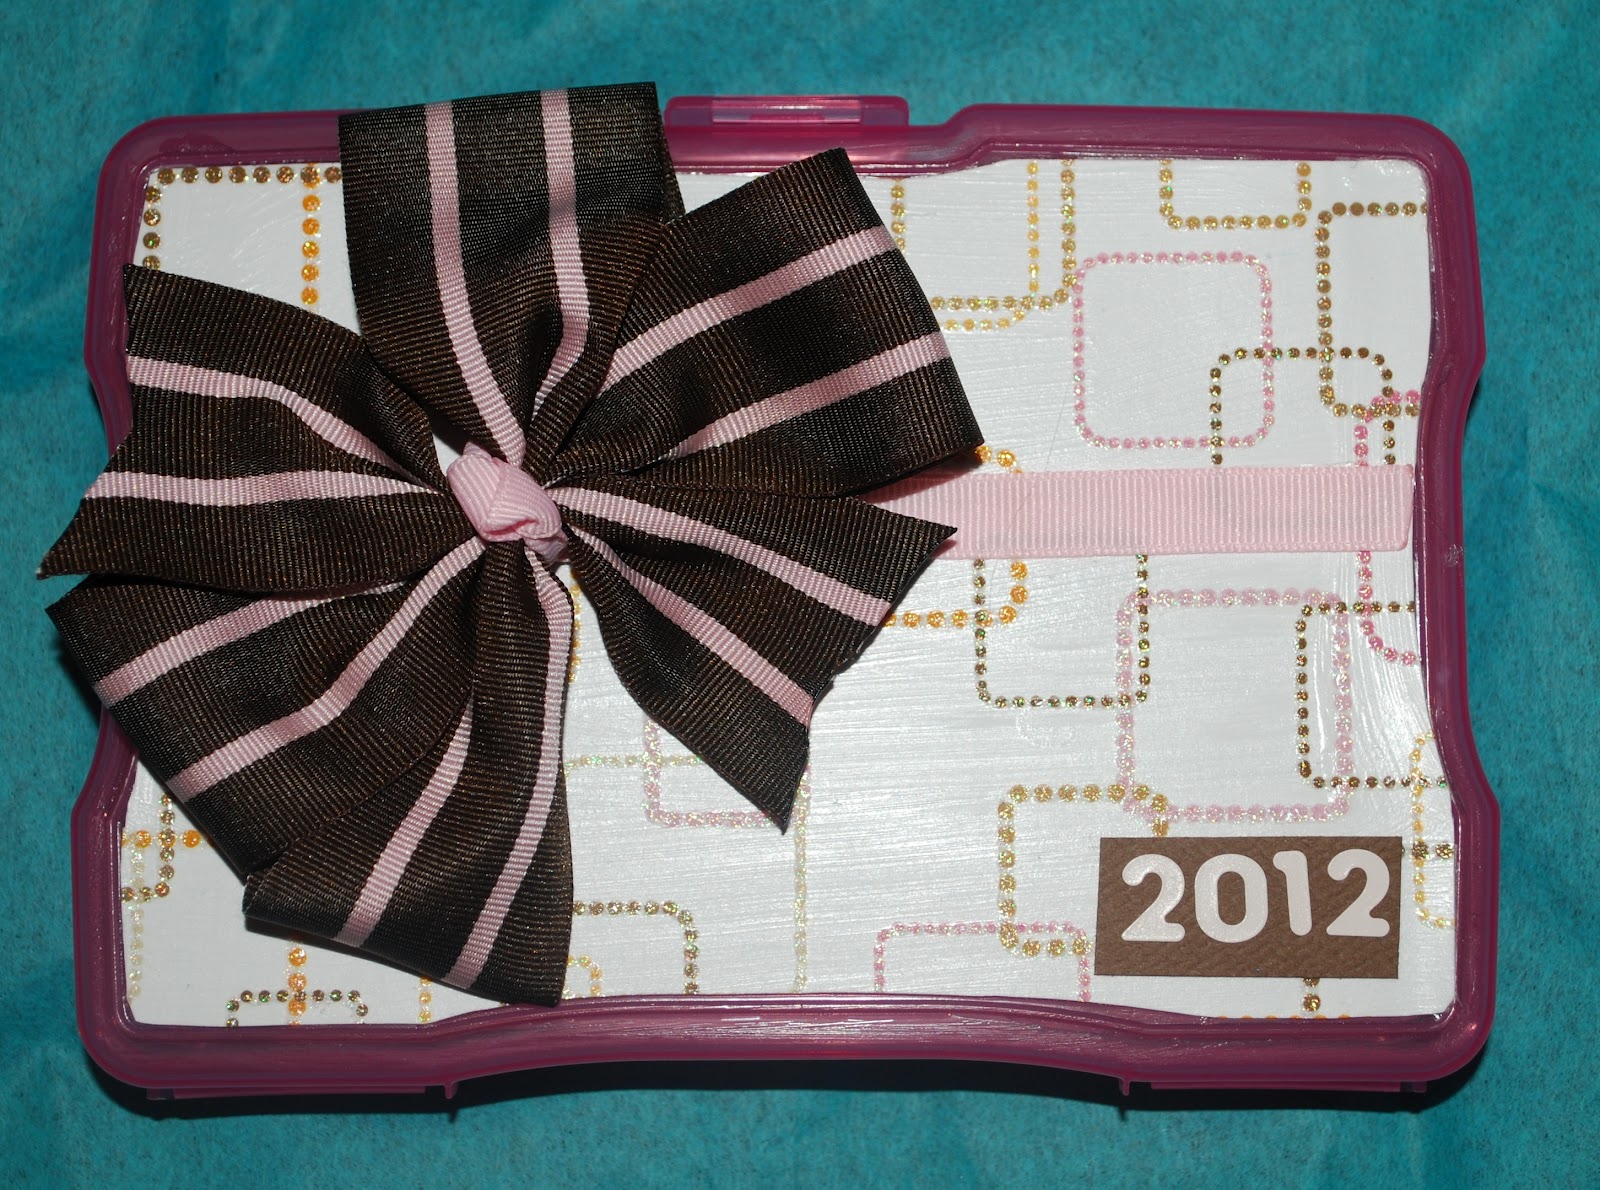
 To make the holder I purchased a 4x6 photo holder from Micheals. I mod podged paper onto the front. I attached a coordinating ribbon with a tape runner. I left a little gap to attach the bow. The bow on there is actually a barrette that I made. I liked how it looked on it plus if she wanted to stack it she could remove the bow and have more room (or she could even use it in her daughter's hair). I also put the year down in the corner.
To go along with the board I had the kids sign an apron.
 I wrapped it all together with another teacher gift for the week:
 The tag says 'We have to Ad-MITT, you are a great teacher! Thanks for all you do!' It was tied onto an oven mitt filled with cooking utensils and the apron wrapped around it.
We were going to get all the kids' pictures taken in an apron and chef's hat, but I didn't have the opportunity to go in there to do that. I wanted to put their pictures on the board next to their recipes. It would have been so cute and added so much more to it.
The other board we decorated (for our second grade teacher) we used the M&M theme. I have used this years ago, but it is pretty popular now. I found a cute poem to go with it.
Here is the board:

The center of the boards says:
 To make the boarder I cut out large circles (as large as I could get on 12x12 paper) in the color of m&m's. I put part of the poem in each circle:

In between the large poem m&m's I put small ones. In the center are m&m's that say 'Ms. Millson is magnificent because' and 'Ms. Millson is Marvelous because'. The kids in her class each filled two of these out and then we hung them up:


 For her treat we made her a bucket of M&M's complete with the poem. I found a clear paint can bucket and filled it with m&m's. I tied ribbon along the side in the colors of the m&m's.
 I also slid in a copy of the poem.
 Both teachers loved their boards! It was a great end of school year board too. I think there may have even been a few tears.
For Teacher Appreciation week I saw some cute door make-overs over at Skip to My Lou. I thought that it would be fun to do for my kids' teachers. I decided to use their bulletin boards and make them over.
I loved the Recipe for Success idea and I had to use that one.

If I had to do it again I would have put plain paper behind it so that it would be easier to read. I then put on the recipe.
 I
I


I asked the students to write their own recipes of what make Mrs. Yawberg a successful teacher. I photo copied their recipes and put them on the board:


The original recipes I put in here:

To go along with the board I had the kids sign an apron.


We were going to get all the kids' pictures taken in an apron and chef's hat, but I didn't have the opportunity to go in there to do that. I wanted to put their pictures on the board next to their recipes. It would have been so cute and added so much more to it.
The other board we decorated (for our second grade teacher) we used the M&M theme. I have used this years ago, but it is pretty popular now. I found a cute poem to go with it.
Here is the board:

The center of the boards says:


In between the large poem m&m's I put small ones. In the center are m&m's that say 'Ms. Millson is magnificent because' and 'Ms. Millson is Marvelous because'. The kids in her class each filled two of these out and then we hung them up:


Download the M&M poem here (as seen in the can)
If you choose to download, please
become a follower first (on the right). I'm happy to share my
creations with my followers. If you would like to leave a comment too
that would totally make my day!
I Belong to a Family & I Love My Brothers and Sisters (Primary Manual 1, Lessons 23 & 24)
Sunbeam Lesson 23 - I Belong to a Family
Sunbeam Lesson 24 - I Love my Brothers and Sisters
First take a look at this post.
If I had to do it all again I would spread the chain out through all three lessons in which you talk about family. Print out the chains (from the link above) and divide them between the three lessons - Lessons 23, 24, 25.
For lesson 23 color the self link and parents link.
For lesson 24 color the brother & sister links.
For lesson 25 color the extended family links.
It took a lot of time to try and draw bodies on all the links and put them together (plan on teaching them how to draw stick figures the first lesson). This will cut down on the coloring time and on the day of the last lesson you could have the chains linked together already minus the ones they will make that day.

We did the chains (above) and read a story about Moses. They did a lot of talking about their brothers and sisters. We talked about how to be kind to our siblings and how much we love them. The kids then got to take a treat home to each sibling and a little note. A Kiss seems the perfect gift for a sister or brother.
I decided to make treats with a chocolate kiss on top.
Back to School Teacher Gifts
The school year has began and the best way to start it is with a gift for the teacher. This year I have two in middle school (13 teachers) one in elementary (1 teacher, 7 specialists). The count is getting much higher.
I had planned on giving these during open house to the elementary teacher & specialists, but I began work this week and didn't have time (and I found the idea the day before open house):
 We made them for the first day of school instead. I printed the the tags from here. They had two per sheet and I chose to print them on an 8x11 page four times (8 tags) so each sheet is a little smaller than 2x3.
Using bakers twine I tied three kit kats to the tag. These we gave to the elementary specialists. I didn't take a picture, but for the teacher I put one bag of (opened a bag of snack size) kit kats and three containers of Keurig coffee into some tissue paper. I tied the top with red and white bakers twine and attached a tag. We then slid the tissue into a red and white gift bag.
I had one bag of kit kats left. We tied two kit kats to a tag and gave them to the elementary and middle school office staff and bus driver.
For the middle school teachers I wanted to give them something useful. I'm not sure if you know this or not (I didn't until I worked at the school), but Magic Erasers make EXCELLENT erasers for dry erase boards. I picked some up along with some Expo Markers while they were on sale this summer. I printed some tags and brought out the bakers twine. Using coordinating colors I tied on the tags.
I used two different sayings for the tags:

 This tag used to say: You have been the write teacher for me! For the original idea check out here (plus you can download the past tense there).
Each teacher was given one (I even had an extra one for the elementary teacher). They now have a marker and an eraser to use in class that they don't have to spend their own funds on. It may not be huge, but they will appreciate it.

I had planned on giving these during open house to the elementary teacher & specialists, but I began work this week and didn't have time (and I found the idea the day before open house):

Using bakers twine I tied three kit kats to the tag. These we gave to the elementary specialists. I didn't take a picture, but for the teacher I put one bag of (opened a bag of snack size) kit kats and three containers of Keurig coffee into some tissue paper. I tied the top with red and white bakers twine and attached a tag. We then slid the tissue into a red and white gift bag.
I had one bag of kit kats left. We tied two kit kats to a tag and gave them to the elementary and middle school office staff and bus driver.
For the middle school teachers I wanted to give them something useful. I'm not sure if you know this or not (I didn't until I worked at the school), but Magic Erasers make EXCELLENT erasers for dry erase boards. I picked some up along with some Expo Markers while they were on sale this summer. I printed some tags and brought out the bakers twine. Using coordinating colors I tied on the tags.
I used two different sayings for the tags:
The original idea for the 'spell' tag here
The other tag:
Each teacher was given one (I even had an extra one for the elementary teacher). They now have a marker and an eraser to use in class that they don't have to spend their own funds on. It may not be huge, but they will appreciate it.

If you choose to download, please
become a follower first (on the right). I'm happy to share my
creations with my followers. If you would like to leave a comment too
that would totally make my day!
Subscribe to:
Posts (Atom)